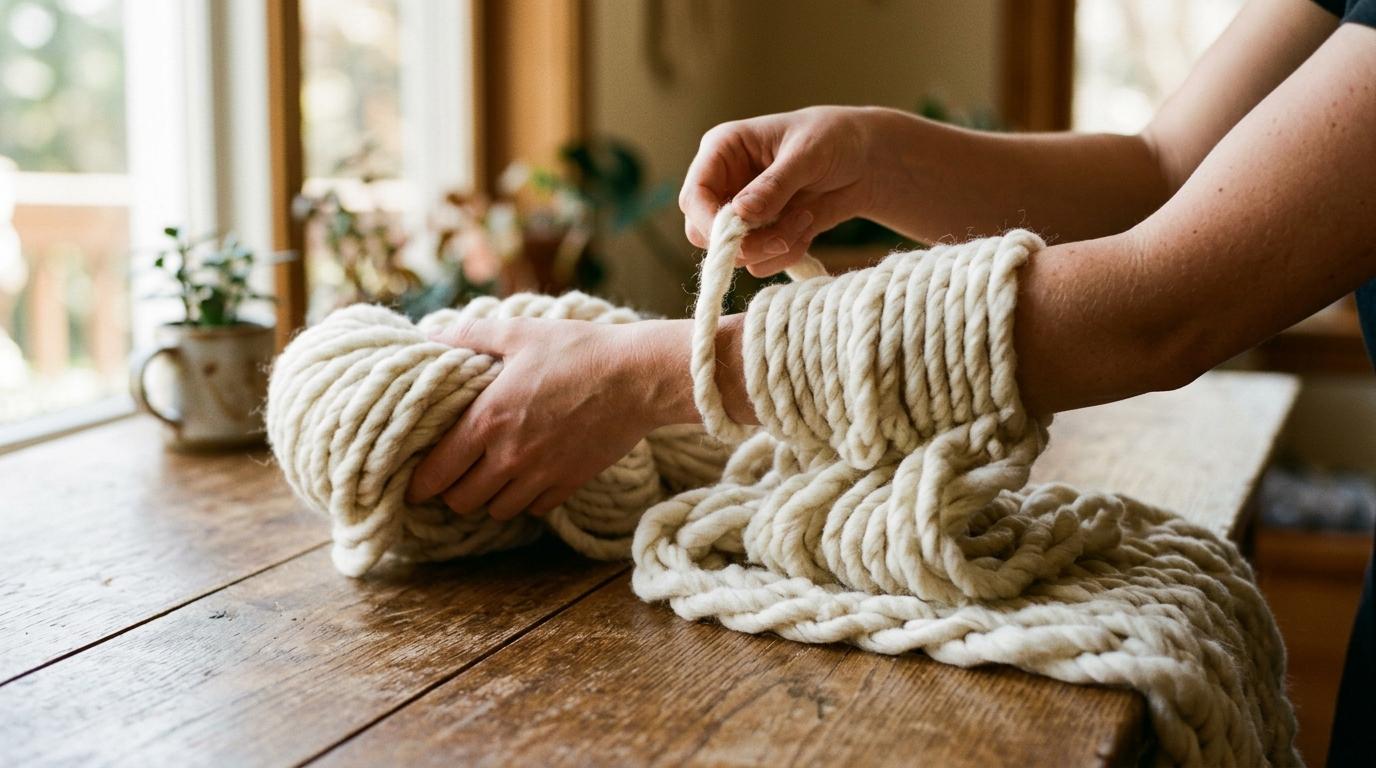
What you need and how it works
Arm knitting uses your forearms and hands as giant knitting needles. Instead of two thin sticks, you loop super-bulky yarn directly onto your arm and work the stitches with your hands. No prior knitting experience needed: if you can tie a slip knot, you can do this.
Choosing your yarn
This only works with chunky or super-bulky yarn: look for weight 6 (bulky) or weight 7 (super bulky) on the label. A single skein of 200–300 yards is enough for a cowl scarf. For a blanket, budget 3–4 skeins. Merino wool blends feel luxurious and hold their shape; acrylic is cheaper and machine-washable.
The arm test
Hold a strand between your fingers. If it's thicker than a pencil, you're good. Thin yarn will take forever and look weedy.
Cast on: loading your arm
Make a slip knot about three feet from the end of the yarn. This tail is your working yarn for the cast-on. Slide the loop onto your right wrist and snug it gently. Cast on however many stitches your pattern needs: a cowl typically uses 20, a blanket 30 or more.
The thumb cast-on method
Hold the working yarn in your right hand. Loop the tail over your left thumb, scoop your right hand under and through that loop, pull a new loop of working yarn through it, and slide the stitch onto your right arm. Repeat until you hit your stitch count. Each stitch should sit loosely: tight stitches are miserable to work with arms this wide.
Checking your tension
Run your fingers along the stitches on your arm. They should slide freely. If they grip, undo the last few and try again without pulling so hard. Loose is better than tight. You can always snug up as you go.
Keep the tail safe
Tuck the cast-on tail under a stitch so it doesn't tangle while you work. You'll weave it in at the end.
Knit every row: the actual stitching
Transfer all the stitches from your right arm to your left. This is your starting position. Now knit them back onto the right arm one by one. That back-and-forth is all arm knitting is.
Working a stitch
With your right hand, reach through the first stitch on your left arm from the front, grab the working yarn, and pull a loop of it through onto your right arm. Slide the old stitch off your left arm. That's one stitch. Work across the whole row, then swap arms and go back the other way. Keep the working yarn behind your arm as you reach through each stitch.
How long to knit
For a cowl, knit until your piece measures about 30 inches. For a blanket, keep going until you reach the size you want, typically 40 to 50 rows. The fabric grows fast. A blanket can be done in a single afternoon of pleasant, meditative repetition.
Take breaks
Your arms are the needles, so they do get tired. Shake your hands out every 10 minutes. If you need to stop mid-project, slip the stitches onto a thick dowel or broomstick so they don't unravel.
Cast off and finish your piece
When your piece is long enough, bind off to lock the final row and stop it unravelling. Takes less than two minutes.
The bind-off
Knit the first two stitches onto your right arm as usual. Then reach into the first stitch with your left hand, lift it over the second stitch and off the arm. One stitch remains. Knit another from the left arm, then lift the bottom stitch over it and off again. Keep going until one stitch is left. Cut the yarn leaving a 6-inch tail, pull the tail all the way through that last loop, and pull firmly to close it.
Weaving in the ends
Thread each tail through a large-eye blunt needle and weave it through 4–5 stitches on the wrong side of the fabric, doubling back once to lock it. Trim flush. For a cowl, seam the two short ends together with the same yarn to form a loop. Lay your finished piece flat, give it a gentle tug to even out the stitches, and you're done.
Your first project
Make a cowl scarf before attempting a blanket. Same technique, much less yarn, and you'll have a finished object in 30 minutes that looks impressive.