Count every cable before you move anything
Plug everything in, then trace each cable from its device to its power source or hub. Most desk tangles persist because no one ever counted. A typical desk runs: monitor power, monitor signal (HDMI or DisplayPort), laptop charger, USB hub, keyboard, mouse, speakers, lamp, phone charger: nine cables. Knowing the count lets you plan routes rather than stuff cables out of sight.
What you need
A velcro cable tie roll (cut to length, reusable forever), a cable tray to mount under the desk, a pack of adhesive cable clips, and a power strip long enough to sit under the desk surface. Total spend usually under £20. No specialist tools needed.
Label before unplugging
Tape a small label to each cable end before disconnecting anything. Reconnecting an unlabelled tangle is how you lose an afternoon.
Move the power strip under the desk
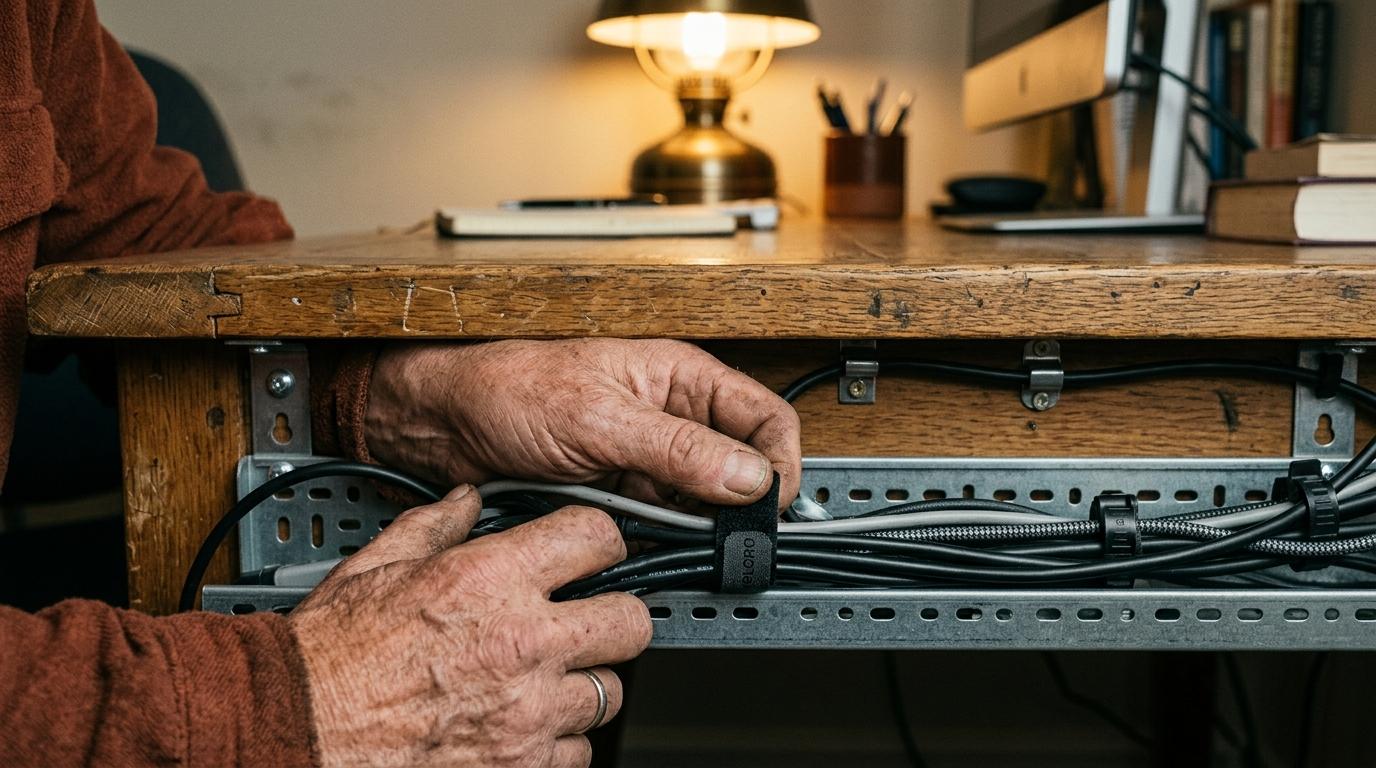
The single change that tidies most desks: get the power strip off the floor. Fit a cable tray, a metal or plastic basket that screws or clamps to the underside of the desk. Put the strip inside it. Now all devices plug straight down into the strip, and only one cable drops to the wall socket. The floor under your desk becomes clear.
Mounting the tray
Screw-mount trays use two screws into the underside. Pre-drill MDF to avoid splitting. Clamp-mount trays grip thicker wood without drilling. Position the tray toward the side where your monitor power and laptop charger sit. Leave one end open so cables enter and exit cleanly rather than bending over the edge.
Leave 10–15 cm slack at each device
Taut cables yank devices when you move them. A small velcro loop at each device end keeps the slack tidy.
Bundle and route signal cables
Signal cables (USB, HDMI, DisplayPort, audio) run from devices to hub or monitor. Bundle cables travelling the same direction using velcro ties every 20–30 cm. Avoid zip ties: they're permanent. Run bundles along the back edge of the desk, held by adhesive clips on the underside of the desk lip. Goal: all cable movement happens behind or below the surface, invisible from the front.
Monitor arm advantage
If your monitor is on an arm, it usually has a built-in cable channel. Thread the monitor cables through it so the screen can swivel without dragging across the desk. Fixed stand? Stick two cable clips to the back of the column and route cables through them before they reach the desk surface.
Final check from the seated position
Sit down and look. You should see: no cables on the desk surface (except laptop charger to laptop if needed), none visible from the front, one cable from desk to wall. If something still looks messy the culprit is almost always a cable that's too short, running diagonally because it can't reach cleanly. A 1-metre extension resolves most of these.
Staying tidy
When you add a new device, spend two minutes re-routing before it becomes part of the tangle. Velcro ties make this trivial: unroll, re-bundle, done. Once a year pull the cable tray out and check for slipped clips or kinked cables.
Wireless eliminates cables entirely
A wireless keyboard and mouse removes two cables. A USB-C monitor hub removes several more. The cleanest desks have fewer cables, not better management.