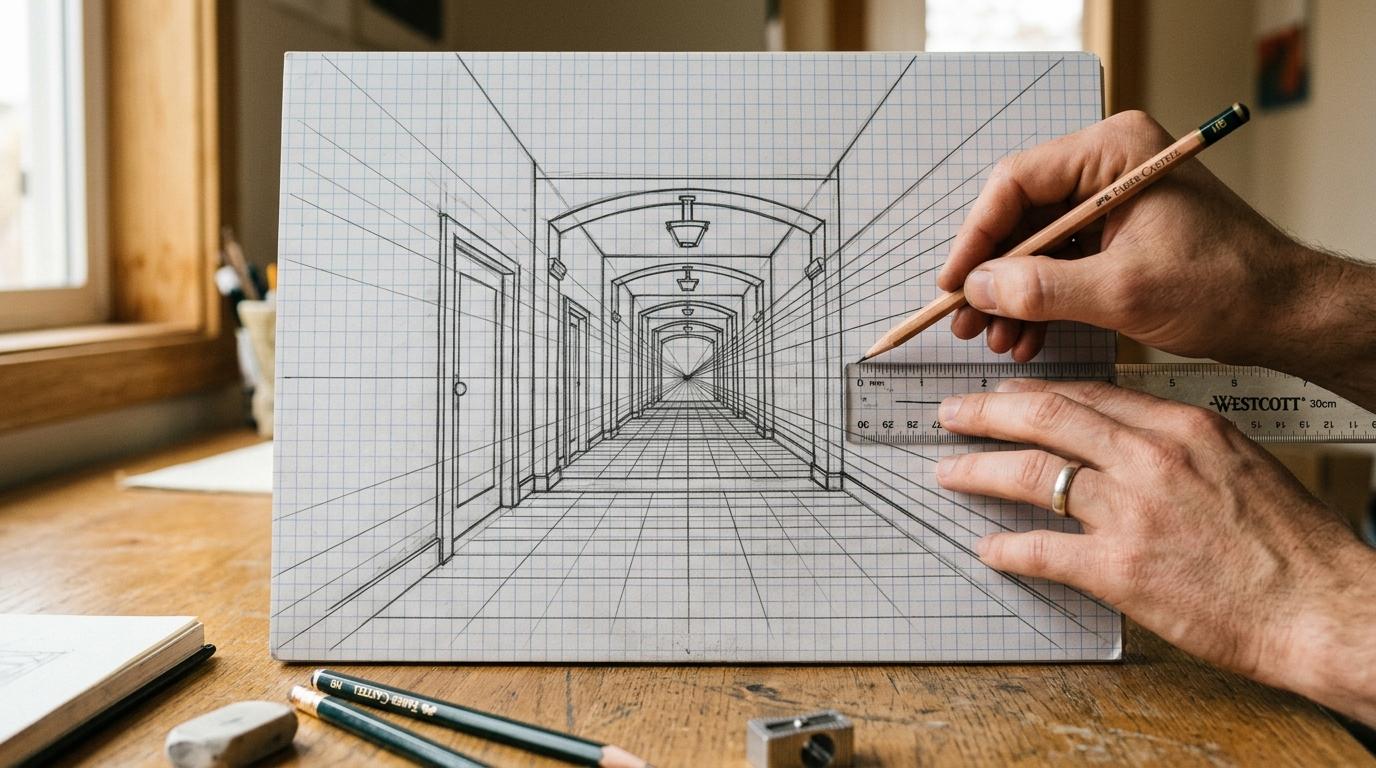
Understanding the vanishing point
One-point perspective is a drawing technique where all parallel lines in a scene converge toward a single dot on the horizon. This is how your eyes experience space. Think of standing in a long hallway and watching the walls, floor, and ceiling all rush toward one point in the distance.
Grab a blank sheet of paper and a pencil. Draw a horizontal line across the middle of the page: this is your horizon line, also called the eye level. Then mark a single dot somewhere on that line. That dot is your vanishing point (VP). Everything you draw will reference these two things.
Why one point works
The horizon line represents your eye level. Objects above it are things you look up at; objects below it are things you look down at. The vanishing point represents the direction you're facing. Keep both consistent and the drawing feels believable.
Start dead center
Place your vanishing point in the middle of the horizon line for your first attempt. It gives you the most balanced view and makes the geometry easiest to follow.
Drawing a basic box
Draw a square or rectangle somewhere on your page, not on the horizon line. This face is the front face of your box, and it stays flat with no perspective distortion. Now draw straight lines from each of its four corners toward your vanishing point. These are called receding lines.
To close the back of the box, draw a smaller rectangle between the receding lines, keeping its edges parallel to the front face. Erase the lines that would be hidden inside the solid box and you have a three-dimensional cube. That's the entire engine of one-point perspective.
Above, below, and on the horizon
Move your front face above the horizon line and you're looking up at the box from below. Move it below and you're looking down on it from above. Place it straddling the horizon line and you see it straight-on. Experimenting with these positions trains your spatial intuition fast.
Keep your ruler handy
Receding lines that wobble even slightly look wrong to the eye. Use a ruler for those lines even if the rest of your sketch is freehand. Accuracy here does the heavy lifting.
Building a room interior
A room is just a box seen from the inside. Draw a rectangle in the middle of your page: this becomes the back wall. Place your vanishing point somewhere inside it. Draw lines from each corner of the back wall outward to the edges of your paper. The floor, ceiling, and two side walls appear instantly.
Now add details: a door on a side wall, a window on the back wall, tiles on the floor. Anything flat on the back wall draws as a normal rectangle. Anything on the side walls or floor needs its receding edges aimed at the vanishing point. Front edges stay vertical or horizontal.
Adding furniture
Every piece of furniture is a modified box. Sketch the front face of a table top as a rectangle, extend receding lines to the VP for the depth, then drop vertical lines downward for the legs. Repeat for a bed, a bookcase, a doorframe. One-point perspective handles interiors well because furniture in a room generally faces the same direction you're looking.
Vary your line weight
Make the edges closest to you heavier and darker. Receding lines and far edges stay lighter. This contrast reads as depth even before shading is added.
Practice exercises and where to go next
The fastest way to level up is to copy from reference. Find a photo of a straight corridor, a city street, or a tidy bedroom and lightly trace the perspective lines to find the vanishing point. You'll almost always find one. Then freehand the scene using what you found. Three or four of these sessions and the geometry becomes instinct.
From here, two-point perspective is the natural next step. It uses two vanishing points on the horizon line and handles corner views of buildings better than one-point can. Everything you learned here transfers directly: the logic is identical, just applied twice.
Keeping a sketchbook
Five minutes of daily perspective sketching (boxes, rooms, hallways) builds the skill faster than longer infrequent sessions. A small A5 sketchbook fits in a bag and removes every excuse. Date your pages so you can look back and see the improvement.
Mistakes are data
A line that goes to the wrong place tells you exactly what your eye misread. Circle the error, draw an arrow to the VP, and your brain files the correction. Skipping over mistakes slows progress.